

Table of Contents
- What Is Wood Pen Turning?
- Essential Pen Turning Tools for Beginners
- Materials You Need: Blanks, Kits, and Brass Tubes
- The Best Wood for Pen Turning
- Step-by-Step: Turning Your First Wood Pen
- Common Beginner Mistakes to Avoid
- Why Pen Turning Classes for Beginners Fast-Track Success
- Frequently Asked Questions
Last Updated: September 25, 2026
What Is Wood Pen Turning?
Wood pen turning is the craft of shaping a small block of wood on a lathe to create a handmade pen. You spin the wood, press a sharp tool against it, and watch a square blank become a smooth, round barrel.

Essential Pen Turning Tools for Beginners
You do not need a shop full of equipment to start. A small set of pen turning tools for beginners will carry you through your first dozen pens.
The Lathe and Safety Gear
The lathe is the heart of the setup. A small bench-top lathe with variable speed control works well for pens, along with a live center, a spur drive, and a chuck.
Safety comes first, every single time:
- Safety glasses, always
- A face shield when roughing
- Dust collection or a respirator
- No loose sleeves or jewelry
Mandrels, Chisels, and Drilling Tools
The pen mandrel holds your blank while you turn it. Bushings slide onto the mandrel to set the diameter for your pen kit.
Materials You Need: Blanks, Kits, and Brass Tubes
Every pen needs three things: a blank, a pen kit, and a brass tube.
Pro TipCheck the tube length against your blank before you drill. If the blank is too short, the tube will poke out and you'll start over. Measure twice.
The Best Wood for Pen Turning
The best wood for pen turning is dense, straight-grained, and easy to cut. Beginners do well with woods that hold shape and finish cleanly.
Beginner-Friendly Species: Wenge, Maple, Walnut, Cherry
- Wenge: Dark, open grain, dramatic stripes. Cuts well but can splinter, so keep tools sharp.
- Maple: Light, tight grain, very forgiving. A perfect first blank.
- Walnut: Rich chocolate color, easy to turn, beautiful figure.
- Cherry: Warm tone that deepens over time. Smooth and predictable.
Grain orientation matters: straight grain is calmer, cross grain shows more figure. Start with straight grain, then experiment.
Step-by-Step: Turning Your First Wood Pen
Here is the full process, from raw blank to finished pen. Follow the order and you will avoid most beginner headaches.
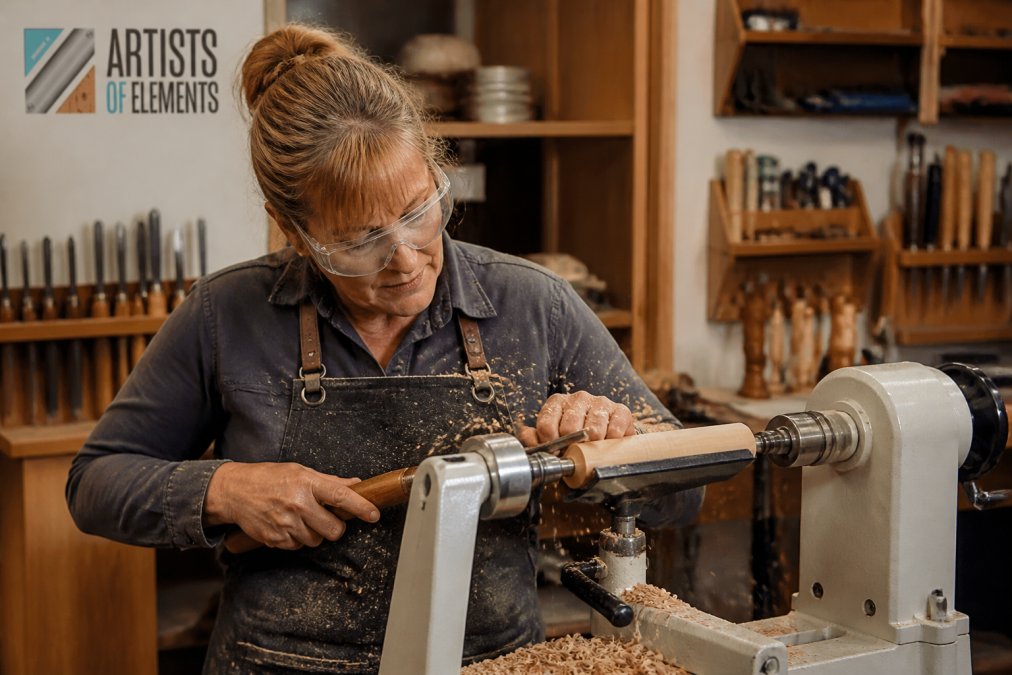
1. Drill the blank
Mark the center on both ends with a center point or awl. A brad-point bit wanders less than a twist bit in end grain. Drill on a drill press or with a lathe chuck, hand-held drilling almost always wanders, and an off-center hole makes one side of the barrel thinner. Drill in short pecks, clearing chips, so the bit does not burn the hole.
2. Glue in the brass tube
Scuff the brass tube with 220-grit so the adhesive has something to bite. Use medium-viscosity CA glue or two-part epoxy. Coat the tube all the way around, twist it as you insert it, and seat it so a little glue squeezes out both ends. Let it cure fully, CA in seconds with accelerator, epoxy overnight.
3. Square the ends
This is the step beginners rush and regret. Use a pen mill or barrel trimmer to cut the blank flush with the brass tube on both ends. If the ends are not square, the hardware will not seat straight and the pen will have visible gaps. Trim in light passes and stop the moment the cutter touches brass, you are trimming wood, not metal.
Pen Turning Workshop - Craft Your Own →
4. Mount on the mandrel
Slide the bushings and blank onto the mandrel in the order your kit instructions show. The bushings set the finished diameter, so match them to your pen kit. Bring the tailstock up with the live center and tighten just until the blank stops spinning freely, over-tightening bows the mandrel and turns an out-of-round pen.
5. Turn to shape
Start with a roughing gouge to bring the blank down to near-bushing diameter, then switch to a skew or spindle gouge for final passes. Ride the bevel, the flat underside of the tool, against the wood and let the cutting edge slice, not scrape. Work at moderate speed. If you see smoke or the wood darkens, you are cutting too fast or with a dull edge.
6. Sand through the grits
Stop the lathe and sand lengthwise with the grain at each grit to remove cross-grain scratches. Then run the lathe and work through 80, 120, 180, 240, 320, 400, and up to 600 for a glass-smooth surface. Do not skip grits, each removes the scratches the previous grit left. Wipe dust off between grits.
7. Apply finish
Three finishes dominate beginner pen turning:
- Friction polish, a shellac-and-oil blend that builds a warm, natural sheen in seconds. Fast and forgiving, but it wears with heavy daily use.
- CA glue finish, thin layers of cyanoacrylate built up and polished to a hard, glass-like, durable coat. The most popular choice for a pen that gets used every day, but it takes practice to apply evenly without ridges.
- Lacquer or wipe-on poly, slower to cure and needs a dust-free space, but gives a deep, traditional look.
Whichever you choose, let each coat dry or cure fully before the next. A wet coat under a dry one traps solvent and turns cloudy.
8. Assemble
Press the hardware in with an assembly press or a bar clamp with the right fittings. Check alignment before you commit, once a transmission or center band is pressed in crooked, backing it out usually damages the finish. Press the tip, then the transmission, then the clip and cap, following your kit's order, and test the mechanism before the final press.
Step |
What You Do |
Watch For |
|---|---|---|
Drill |
Bore the center hole |
Wandering bit, burned hole |
Glue |
Set the brass tube |
Air gaps, tube not seated |
Square |
Trim blank ends |
Chipped edges, brass nicked |
Mount |
Load the mandrel |
Loose bushings, bowed mandrel |
Turn |
Shape the profile |
Tear-out, burned wood |
Sand |
Work up the grits |
Skipped grits, cross-grain scratches |
Finish |
Seal and polish |
Wet finish, trapped solvent |
Assemble |
Press in hardware |
Crooked parts, damaged finish |
Pro TipKeep a scrap blank of the same wood next to the lathe and use it to test your finish schedule before you commit to the real pen. It costs you ten minutes and saves you a finished barrel.
Common Beginner Mistakes to Avoid
Most first pens fail for the same handful of reasons. None are hard to fix, but these are the failures that actually end a pen's life.
The four failures that ruin a pen
Blowouts. A blowout is when the wood shatters off the blank while turning, usually at a thin spot or near the barrel end. It happens with too aggressive a cut, a dull tool, or a brittle or spalted blank turned too thin. Prevention: sharp tools, light passes, and stop cutting the moment the barrel reaches bushing diameter.
The everyday mistakes
- Turning too fast. High speed burns the wood and dulls your tools. Slow down and take light cuts.
- Skipping grits. Jumping from 120 to 400 leaves deep scratches you cannot polish out.
- Not letting finish dry. Wet finish smears and gums up. Give each coat real time.
- Dull tools. A dull gouge tears the grain instead of slicing it. Sharpen often, a sharp skew is safer than a dull one.
- Over-tightening the mandrel. Too much pressure bends the mandrel and makes the pen out of round.
- Sanding across the grain on the lathe. The spinning sandpaper leaves circular scratches that show up the moment you apply finish. Stop the lathe and sand lengthwise at each grit.
- Rushing the squaring step. If the ends are not flush with the tube, the hardware will not seat and the pen will have visible gaps.
Watch OutGlue the brass tube with too little adhesive and it will spin inside the blank during assembly. Once that happens, the pen is ruined. Use enough glue to coat the whole tube, and scuff the brass first so the glue has something to grip.
Key TakeawayThe pens that fail are almost never the ones with the wrong tools. They are the ones where a step was rushed, glue not cured, ends not squared, grits skipped. Slow down on the boring steps and your pens will come out right.
Why Pen Turning Classes for Beginners Fast-Track Success
A class compresses months of trial and error into a single session, with hands-on instruction, sharp tools, and someone watching your technique in real time.
- Small class size for personal attention
- All materials and tools provided
- Beginner-friendly, no experience needed
- A finished pen to take home
Key TakeawayThe fastest way to learn pen turning is to turn one with someone guiding you. One class beats ten hours of watching videos.
Frequently Asked Questions
How long does it take to learn pen turning?
Most beginners complete their first pen in about 2 to 3 hours with hands-on instruction. The core skills, drilling, gluing, turning, sanding, and finishing, are straightforward once you see them demonstrated. A structured class compresses the learning curve dramatically compared to trial and error at home. After one session, many people feel confident enough to turn a second pen on their own.
What RPM should I use for pen turning?
For turning wood blanks, a speed range of 1,200 to 1,800 RPM works well for most beginners. Start slower while roughing the blank into a cylinder, then increase speed as the piece becomes balanced. When sanding, slow down to reduce heat buildup. When applying friction polish, higher speeds help the finish cure. Always match speed to the task and the wood's condition.
What equipment is essential for beginner pen turning?
You need a lathe, a pen mandrel with bushings, a roughing gouge and spindle gouge, a drill press or lathe chuck, sandpaper from 80 to 400 grit, CA glue or friction polish, and an assembly press. Safety glasses and a face shield are non-negotiable. A dust collection system or mask keeps the air clean. Many beginners start with a midi lathe, which handles pen blanks comfortably without taking up much space.
Do I need a workshop to start turning pens?
You do not need a dedicated workshop. A midi lathe, mandrel, and basic tools fit on a sturdy bench in a garage or spare room. The main requirements are good lighting, ventilation, and a stable surface. That said, taking a class first lets you use professional equipment and learn proper technique before investing in your own setup. Artists of Elements offers beginner pen turning classes with all materials and tools provided.